NOKIA TA-1380 UNLOCK NETWORK WITH FILE AND CHEETAH TOOL PRO
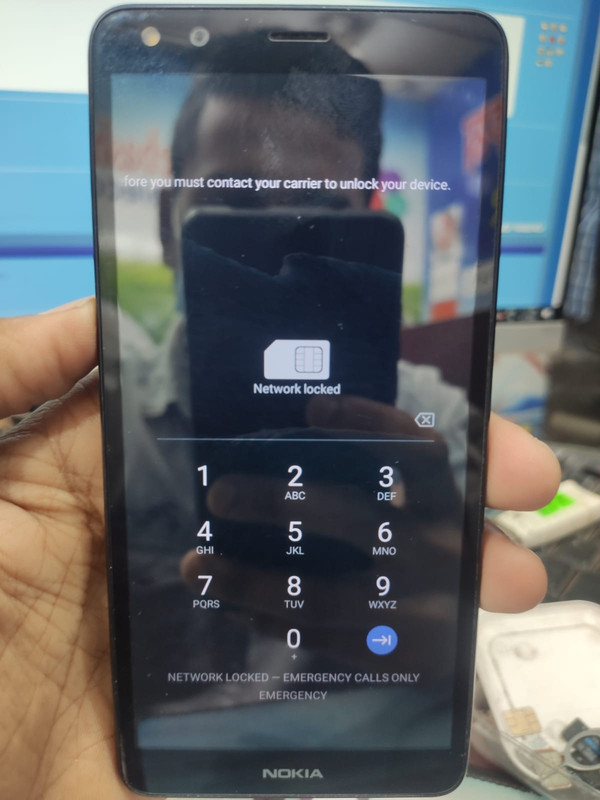
HOW TO DO THE PROCESS TO UNLOCK NOKIA C1 TA-1380?
Cheetah Tool is a diagnostic and firmware tool used for mobile phones and other devices. Its primary functions include identifying device models, reading and writing firmware, and managing various hardware operations. To use Cheetah Tool for identification purposes:
Install Cheetah Tool: Ensure you have the latest version of Cheetah Tool installed on your computer. You can download it from the official website or trusted sources.
Connect Your Device: Using a suitable USB cable, connect your device to the computer. Make sure the device is turned on and properly recognized by the system.
Launch the Tool: Open Cheetah Tool. You may need to install drivers if the device is not immediately recognized. Follow the on-screen prompts to install any necessary drivers.
Select Device Identification Mode: Navigate to the identification section of the tool. This is usually found under a tab labeled "Device" or "Identification."
Initiate Identification: Click the button to start the identification process. The tool will communicate with the device and attempt to read its information. This can include the model number, software version, and other relevant details.
Review Results: Once identification is complete, review the displayed information. The tool will show the device's make, model, and other specifics. Confirm that this information matches your device.
Save or Document Information: If necessary, save the identification results for future reference. This can be useful for troubleshooting or verifying device compatibility with software or firmware.
2. Backup Security Data
Backing up security data is crucial for protecting information and ensuring you can recover it if needed. Here’s a step-by-step guide:
Choose Backup Software: Select reliable backup software that supports your device and data types. This might be built into your device’s operating system or available from third-party developers.
Connect Device: Connect your device to the computer using a USB cable or other appropriate connection method.
Launch Backup Software: Open the backup software and navigate to the backup section. This is usually labeled “Backup,” “Data Protection,” or similar.
Select Data to Backup: Choose the security data you wish to back up. This can include passwords, encryption keys, and other sensitive information. Make sure to include all relevant data to ensure a complete backup.
Choose Backup Location: Specify where the backup file will be saved. This could be on your computer, an external hard drive, or a cloud storage service. Ensure that the location is secure and accessible.
Start Backup Process: Initiate the backup process by clicking the appropriate button. The software will begin copying the selected data to the backup location.
Verify Backup: Once the backup is complete, verify that all data has been successfully copied. Check the backup file for completeness and ensure that it can be accessed and restored if needed.
Secure Backup: Store the backup in a secure location. If using cloud storage, ensure your account is protected with strong passwords and two-factor authentication.
3. Flash Unlock File
Flashing an unlock file involves modifying your device’s firmware to gain access or enable specific features. Here’s how to handle this process:
Obtain Unlock File: Download the unlock file from a trusted source. This file may be provided by the device manufacturer or a reputable developer.
Prepare the Device: Ensure the device is charged and connected to your computer. You may need to boot the device into a specific mode, such as download or recovery mode, depending on the device and the flashing procedure.
Open Flash Tool: Launch the flashing tool you will use. This could be a specific software program designed for your device or a more general tool like SP Flash Tool.
Select Unlock File: In the flash tool, locate the option to load or select the unlock file. Choose the file you downloaded.
Handle Empty File Issue: If the tool shows the file as empty or not properly loaded, do not worry. This can sometimes occur due to file format issues or tool compatibility. Select the empty file and proceed by selecting the folder where the file is located.
Navigate Back and Flash: Go back to the main interface of the flash tool and ensure all settings are correct. Click the flash button to start the process. The tool will attempt to flash the unlock file to your device.
Monitor Progress: Keep an eye on the flashing process. It may take several minutes, and the device may reboot several times.
Verify Completion: Once the flashing is complete, the tool should indicate success. Check the device to ensure that the unlock file has been applied correctly and that the device operates as expected.
4. Unlock Bootloader
Unlocking the bootloader allows you to gain access to the device’s firmware and make modifications. Here’s how to unlock the bootloader:
Enable Developer Options: Go to the device’s settings and enable Developer Options. This is typically found under “About Phone” by tapping the build number multiple times.
Enable OEM Unlocking: Within Developer Options, enable the “OEM Unlocking” option. This setting allows you to unlock the bootloader.
Backup Data: Before proceeding, make sure to back up your data. Unlocking the bootloader will usually erase all data on the device.
Install ADB and Fastboot Tools: Download and install ADB (Android Debug Bridge) and Fastboot tools on your computer. These tools are necessary for communicating with the device.
Boot into Fastboot Mode: Turn off your device and boot it into Fastboot Mode. This is usually done by holding a combination of buttons (e.g., Power + Volume Down) while turning the device on.
Connect to Computer: Use a USB cable to connect your device to the computer. Ensure that drivers are installed for proper communication.
Open Command Prompt or Terminal: On your computer, open a command prompt or terminal window.
Verify Device Connection: Type the command
fastboot devicesto check if your device is recognized. You should see a serial number listed.Unlock Bootloader: Type the command
fastboot oem unlockorfastboot flashing unlock(depending on your device) to initiate the bootloader unlocking process. Confirm any prompts on your device.Reboot Device: Once the process is complete, reboot your device. It may take longer than usual to start up as the device reconfigures itself.
Verify Unlock: After rebooting, check if the bootloader is unlocked. You might see an unlocked bootloader warning on startup.
5. Reset with CM2 or Avengers Diag Mode
CM2 (Infinity Chinese Miracle 2) and Avengers are diagnostic tools used for resetting and managing devices. Here’s how to perform a reset using these tools:
Install CM2 or Avengers Software: Download and install the CM2 or Avengers software on your computer. Ensure you have the latest version.
Connect Device: Connect your device to the computer using a USB cable. Make sure the device is in Diag Mode, which is often required for these tools to function.
Launch Software: Open the CM2 or Avengers software.
Select Device Model: In the software, select the model of your device from the list. This ensures that the software uses the correct settings for your device.
Choose Reset Option: Navigate to the reset section of the software. This is often labeled “Reset,” “Factory Reset,” or similar.
Initiate Reset: Click the button to start the reset process. The software will communicate with the device and perform the reset. This may involve wiping data, clearing cache, and restoring default settings.
Monitor Progress: Watch the progress bar or indicators in the software to ensure the reset is proceeding correctly.
Complete and Reboot: Once the reset is complete, the software will usually prompt you to reboot the device. Follow the prompts to restart your device.
Verify Reset: After rebooting, check that the device has been reset to factory settings. Verify that data has been wiped and that the device operates as expected.
Troubleshoot if Needed: If the device does not reset properly, consult the software’s documentation or support resources for troubleshooting tips.
This detailed guide provides an overview of the necessary steps for each process. For each tool and procedure, ensure you follow specific instructions related to your device and software version. Always use caution when performing operations that can affect your device’s firmware and data.
- FILE: 500 MT
- HELP: 150 MT

Post a Comment